3DVista tours come with HTML, CSS, and JavaScript files. With a few simple code tweaks, you can change things that the 3DVista software doesn’t let you adjust on its own. In this guide, we use plain language and examples to explain what each part of the tour code does. You’ll also learn how to safely make useful changes – from changing the start scene or colors to integrating with WordPress or an LMS.
Every virual tour outputs these files:
What 3DVista gives you: A full-screen page plus a stylesheet that paints the loading spinner and basic layout.
What 3DVista gives you: A JavaScript file that loads all image tiles and draws them with WebGL (the browser’s 3D paintbrush).
When someone spins the view a full 180 degrees, you know they are really exploring the scene. That single Google Analytics event is handy for five big reasons:
What 3DVista gives you: An optional module that pops up questions and records scores.
A WordPress REST:
It’s a special web address on your site that starts with /wp-json/.
You create the address in your plugin or theme with the register_rest_route() function.
When your quiz sends a POST request to that address—such as /wp-json/quiz/v1/answer—WordPress runs the PHP function you linked to it.
That function stores the answer in the database.
Think of the REST route as the doorway, the POST as the knock, and your PHP code the delivery.
quiz/v1) keeps your routes separate from core ones./answer) identifies what the call is for.POST so the tour can push JSON like { "question": 3, "choice": "B" }.update_user_meta( $user_id, 'quiz_progress', $new_data );).In short, the REST route is simply the doorway (/wp-json/quiz/v1/answer) that your tour calls; WordPress handles the door and hands your code the payload so you can record each answer and track progress.
What 3DVista gives you: Lets another browser or device steer the tour—great for guided lessons.
What 3DVista gives you: One little file called script.js.
Inside it, 3DVista already picks the first scene and listens for clicks or taps.
The fun starts when you add a few new lines.
Think of script.js as the tour’s remote control: change the code, and the tour does new tricks.
script.js can check if the device sits in landscape-upside-down (the Cardboard position)
and switch to VR view automatically – no extra tap needed.
localStorage: if a visitor comes back tomorrow,
skip the intro music so they aren’t startled twice.
script.js pings your CRM (Customer Relationship Manager) to tag them as “High Interest – Luxury.”
Your sales team gets an instant notice.
player.setTilePath('panos_low/'); to use lighter tiles.
Fast networks keep the ultra-sharp default set.
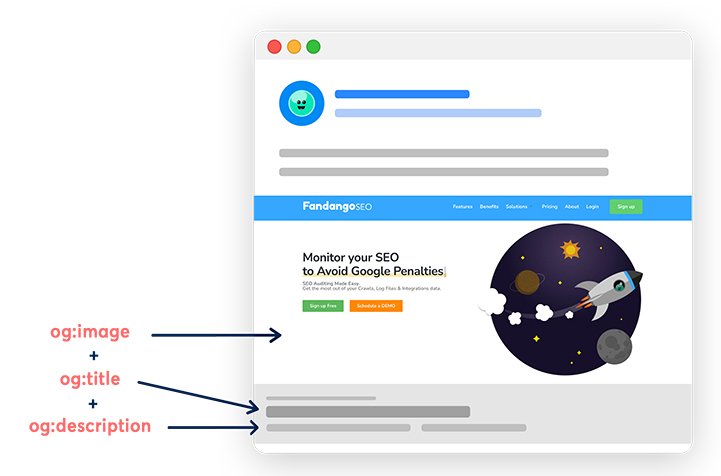
The HTML file exported by 3DVista includes the basics like <meta charset>, <meta viewport>, app icons, and PWA setup. But it does not include any Open Graph (og:) or Twitter Card tags.
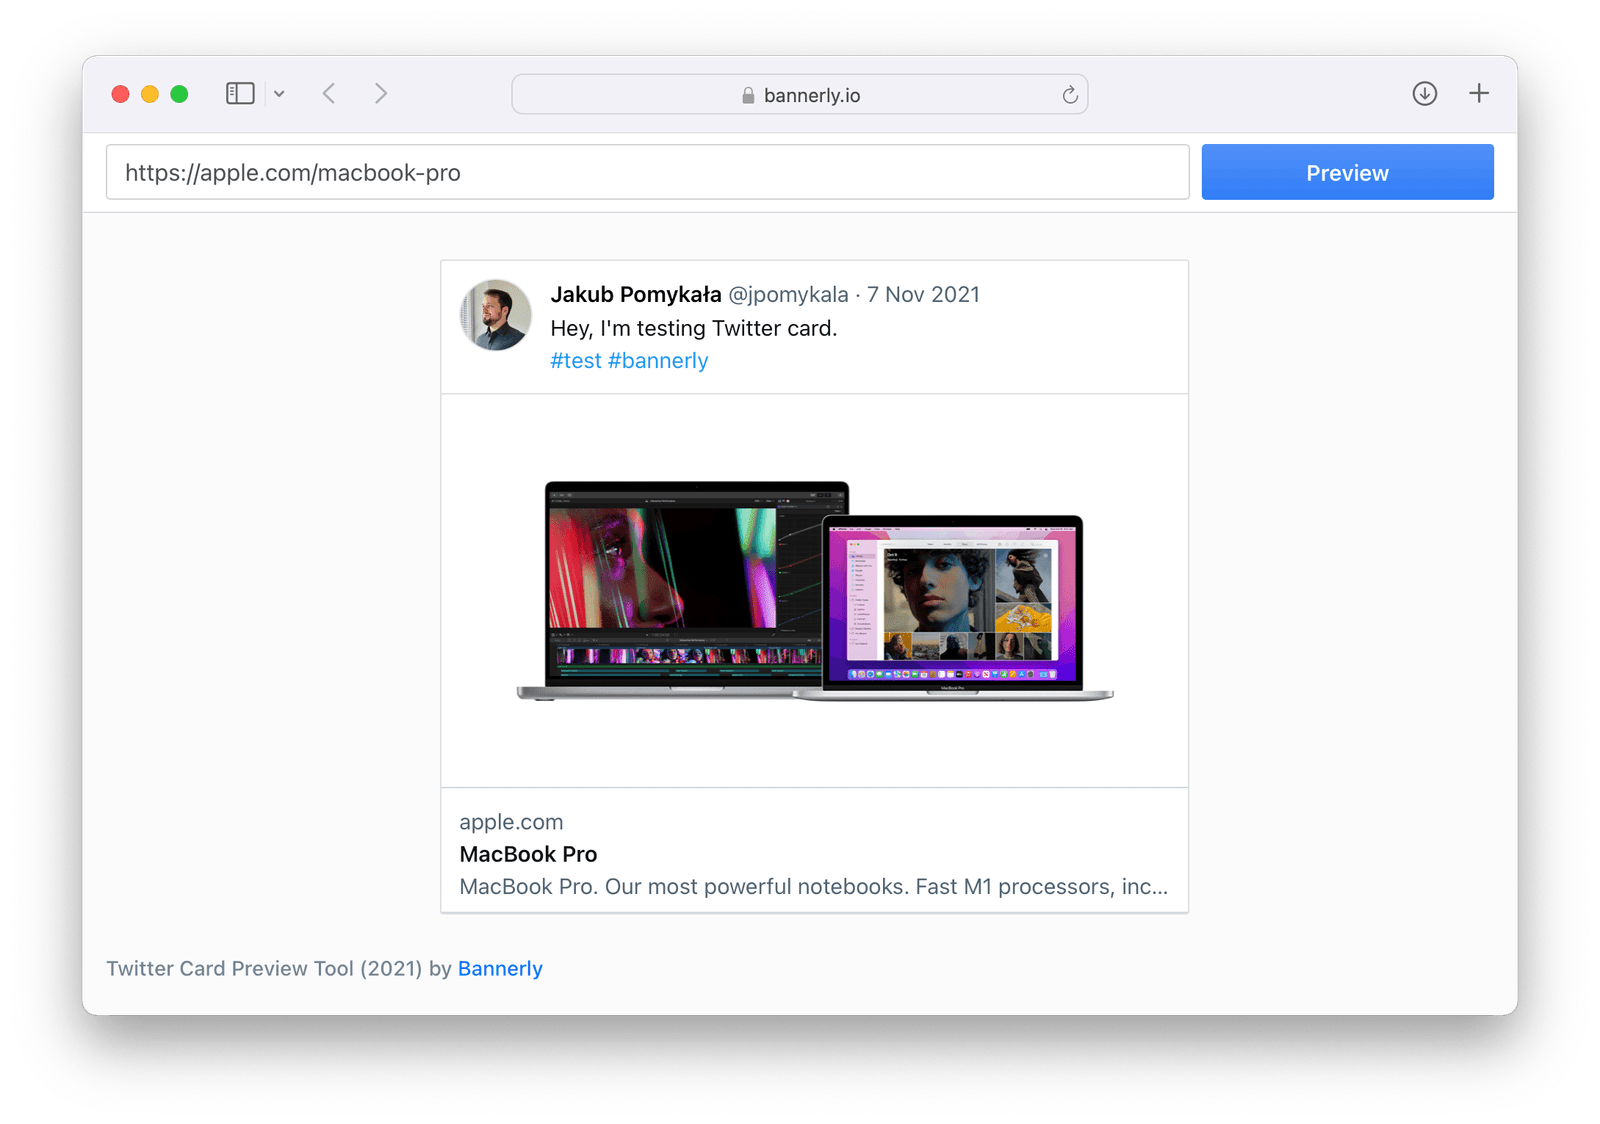
That means if someone shares your tour link on Facebook, LinkedIn, or Twitter/X, the platform may only show a plain URL or scrape a title from the page—not a preview image or custom description.
<meta property="og:title"       content="Walk Through the Penthouse in 360°">
<meta property="og:description" content="Explore every room, click hotspots for details, and take the quiz at the end.">
<meta property="og:image"       content="https://yourcdn.com/tour/social-thumb.jpg">
<meta property="og:url"         content="https://tours.yourbrand.com/penthouse">

<meta name="twitter:card"        content="summary_large_image">
<meta name="twitter:title"       content="Walk Through the Penthouse in 360°">
<meta name="twitter:description" content="Interactive 3D tour—no VR goggles needed.">
<meta name="twitter:image"       content="https://yourcdn.com/tour/social-thumb.jpg">
Tip: Create your wrapper once, host it on a branded subdomain like tours.yourbrand.com, and always point social traffic to that page. You’ll get full preview control on all major platforms—without ever needing to touch your exported tour again.
script.js/* ------------- Time-based start scene ------------- *
Morning (5-11) → "Garden"
Afternoon (11-17) → "Lobby"
Evening / Night → "Rooftop"
*/
(function () {
var h = new Date().getHours(); // current hour (0-23)
var scene = (h < 11) ? "Garden"
: (h < 17) ? "Lobby"
: "Rooftop";
player.once('tourReady', function () { // wait till viewer is ready
player.loadScene(scene);
});
})();Why it helps: Visitors see a scene that fits the real sun outside, making the tour feel “alive.”
/* ------------- Auto-VR on rotation ------------- *
   Phone flips landscape-upside-down → enter VR
   Phone upright again             → exit VR
*/
(function () {
  window.addEventListener('deviceorientation', function (e) {
    if (!player) return;
    var autoVr = Math.abs(e.gamma) > 70 && Math.abs(e.beta) < 30;
    if (autoVr && !player.isVR())  player.enterVR();
    if (!autoVr && player.isVR())  player.exitVR();
  }, true);
})();
Why it helps: Hands-free VR—no tiny buttons to press.
/* -------- Send “tour finished” to Zapier -------- *
   Replace YOUR_WEBHOOK_URL with the unique URL
   Zapier gives you.
*/
(function () {
  var done = false;
  player.on('sceneEnded', function () {
    if (done) return;     // fire once
    done = true;
    fetch('https://hooks.zapier.com/hooks/catch/XXXXXX/YOUR_WEBHOOK_URL', {
      method: 'POST',
      body: JSON.stringify({ event: 'tour_end', time: Date.now() })
    });
  });
})();
Why it helps: Zapier can email you, post to Slack, or add a row to Google Sheets the instant someone finishes.
/* -------------- Live weather overlay -------------- *
Pulls current temperature from the free Open-Meteo API
every 15 min and writes it into <div id="weatherBox">
*/
(function refreshWeather () {
var lat = 28.6084, lon = -80.6040; // Cape Canaveral example
fetch('https://api.open-meteo.com/v1/forecast?latitude=' + lat +
'&longitude=' + lon + '¤t_weather=true')
.then(r => r.json())
.then(j => {
var w = j.current_weather;
document.getElementById('weatherBox').textContent =
w.temperature + ' °C · code ' + w.weathercode;
})
.catch(console.error)
.finally(() => setTimeout(refreshWeather, 15*60*1000));
})();Why it helps: Outdoor panoramas feel current—perfect for open-air attractions or property tours.
/* ------------- Firebase live leaderboard ------------- *
   Needs a free Firebase project. Replace the config keys
   and add Firebase SDK scripts in your HTML <head>.
*/
(function () {
  var cfg = {
    apiKey:      "YOUR_KEY",
    authDomain:  "your-app.firebaseapp.com",
    projectId:   "your-app",
    databaseURL: "https://your-app.firebaseio.com"
  };
  firebase.initializeApp(cfg);
  var db = firebase.database().ref('scores');

  // Write score when quiz ≥ 80 %
  player.on('quizFinished', function (d) {
    if (d.scorePercent >= 80) {
      var n = prompt('Great score! Name for the board:','');
      db.push({ name: n || 'Anon', score: d.scorePercent, time: Date.now() });
    }
  });
})();
Why it helps: Students see their names climb a real-time scoreboard—instant motivation!
Bottom line: If HTML is your house and CSS is the paint,
script.js is the light switch, thermostat, and garage-door opener in one.
A few lines of plain JavaScript turn a normal 3DVista tour into an app that responds to time of day, user behaviour, outside data, and even voice commands – all without leaving the browser.
What 3DVista gives you: A small JSON file that turns the tour into a Progressive Web App (installable on phones).
manifest.json set"display": "standalone""display": "standalone" gives
your virtual tour that same polished, app-like experience.
Start in a different scene each morning, afternoon, and night:
YES
(using 3DVista’s scripting interface)
BUT: There is no built-in scheduling for start scenes. A custom script in
script.js must check the current time and jump to the right panorama. This logic can also store user
data so viewers return to their last scene. In short, time-based scene selection works, but only by injecting a
small JS snippet (no external tools required).
Jump to a random “hidden gem” scene via a “Surprise Me” button: YES (using 3DVista’s scripting interface) BUT: 3DVista has no native “random scene” action. You must list hidden panoramas in a script, then let a Skin-Editor button trigger a JS function that picks one at random and loads it through the API. A few lines of code create the effect, but it isn’t a built-in toggle.
Auto-enter VR when the phone enters a headset (orientation detect): YES (using 3DVista’s scripting interface) BUT: Users normally tap the VR icon. To auto-switch you must add JavaScript that listens for device-orientation events and calls the player’s VR function. It’s doable without an external app, but not exposed in the UI.
Play background music only once per visitor:
YES
(using 3DVista’s scripting interface)
BUT: The tour itself can’t remember visitors. A short script must store a
localStorage flag after the first play, then mute or skip the audio on future visits. No visual
setting exists for this.
Send Zapier webhooks at key moments (scene load, tour finish, quiz score):
YES
(using 3DVista’s scripting interface)
BUT: You must hook into events like
player.bind('panoramaActivated') and post data out with fetch(). There’s no Zapier
button—only raw JavaScript plus a catch URL.
Unlock WordPress content mid-tour via API call:
YES
(using 3DVista’s scripting interface)
BUT: The tour can’t talk to WP on its own. A custom
fetch('https://yourwp.com/wp-json/...') in a “Run JavaScript” action must trigger the unlock. You
may also route through Zapier—either way, code is required.
Show live weather data on outdoor panoramas: YES (using scripting or plugin) BUT: Live data isn’t native. You either install a Skin-CMS-type add-on or write a script that calls an API like OpenWeather every few minutes and updates a label or icon. Without that code, the tour remains static.
Trigger a CRM tag when a user spends 2+ minutes in a specific scene:
YES
(using 3DVista’s scripting interface)
BUT: Timer logic must be scripted. You listen for scene entry, start a
setTimeout, and if the user stays long enough, send a webhook to the CRM. It’s fully possible, but
not point-and-click.
Swap image tile sets based on network speed (low-res fallback): NO (requires custom scripting or external tools) BUT: 3DVista provides multi-resolution tiles but cannot pick an alternate panorama set based on bandwidth. You’d need a wrapper that measures speed and loads a separate low-quality tour or script that swaps scenes manually—both heavy custom work.
Build a real-time leaderboard from quiz scores: NO (requires custom scripting or external tools) BUT: Scores live only in the user’s session. To aggregate them you must post each score to an external database or Google Sheet, then pull the top results back into the tour via an HTML widget or dynamic text.
Add voice-command support (“Next room”, “Open map”): NO (requires custom scripting or external tools) BUT: The software has no speech recognition. You’d embed the Web Speech API (or similar), parse commands, and call the 3DVista JS API—complex code well outside the base editor.
3DVista makes great 360° tours, but its built-in image export has limits. Below you’ll find:
mogrify -format jpg *.webpmogrify -quality 70 *.jpg<picture> tag around each tile link
to serve AVIF → WebP → JPEG in that order, or lazy-load non-pano images
with loading="lazy".
This takes manual editing but gives fine control..webp tile to .jpg.viewer.js (or your loader), test if the browser supports WebP.
If not, switch the tile path from panos/ to panos_jpg/.-quality 60 on tiles, then host on Cloudflare.
Students on slow 3G still see the tour quickly.panos folder to tiles_hd.script.js:
if (window.devicePixelRatio > 1.5) viewer.setTilePath('tiles_hd/');3DVista’s quick export works fine out of the box, but a little post-export tweaking can make tours load faster, work on every browser, and look sharper on any screen. With free tools like ImageMagick and Squoosh—or a CDN that serves the right format automatically—you can beat the built-in limits without touching the tour editor again.
Because 3DVista ships all these files automatically, you can edit each one for speed, brand style, data tracking, or clever integrations. A few tiny tweaks turn a “plain” tour into a living web app that talks to WordPress, Zapier & friends, and beyond.
You can start the tour in a different room (scene) by editing script.js:
// Original: start in Lobby
TDV.PlayerAPI.create({ startScene: "Lobby" });

// Change to Garden
TDV.PlayerAPI.create({ startScene: "Garden" });
Benefit: You highlight your best room first.
To make the loading screen vanish faster, tweak your CSS:
#preloadContainer {
  transition: opacity 0.2s ease; /* fade out in 0.2 seconds */
}
#preloadContainer.loaded {
  opacity: 0;
}
Benefit: The tour feels snappier and more alive.
If you want blue quiz buttons instead of red, add this CSS rule:
.vista-modifications .tdv-quiz-button {
  background-color: #007aff; /* bright blue */
}
Benefit: Matches your brand or improves contrast for all users.
font-family in your CSS (for example, in the .vista-modifications class) to use any Google Font you like.tileFormat: "webp" to "jpg" if you need to support older browsers that don’t display WebP images.
@media (max-width: 767px) {
  .vista-modifications #viewer {
    height: 60vh; /* show more page and less viewer on phones */
  }
}
Benefit: Keeps your page neat on small screens.
<head> section to add your own meta tags. For example, you can add a <meta name="description" content="Your tour description"/> for better search results. You can also include social media sharing tags so that Facebook and Twitter show a nice preview when your tour link is shared. These tweaks improve how your tour looks on search engines and social networks.<meta name="description" content="Walk through our 360° tour of the Space Museum. See rockets in full detail."><title>Virtual Space Museum – 360° Tour</title>
<link rel="canonical" href="https://example.com/space-tour/">
<meta name="robots" content="index,follow"> (or noindex if you want to hide a test page)
<meta property="og:title" content="Explore the Space Museum"><meta property="og:image" content="https://example.com/preview.jpg"><meta name="twitter:card" content="summary_large_image">
<script type="application/ld+json">
{
  "@context": "https://schema.org",
  "@type": "TouristAttraction",
  "name": "Virtual Space Museum Tour",
  "description": "An online 360° walk-through of real rockets and satellites.",
  "url": "https://example.com/space-tour/",
  "image": "https://example.com/preview.jpg",
  "provider": {
    "@type": "Organization",
    "name": "Galactic Medallion"
  }
}
</script><head>).location, rating, or event.<meta name="geo.region" content="US-FL"><meta http-equiv="content-language" content="en">Benefit: Thoughtful metadata makes your tour easier to find, shares with a nice preview, and can even earn “rich-snippet” treatment (extra info shown right on the search page).
script.js to trigger WordPress actions when certain events happen. For instance, you could call a WordPress REST API when a scene loads or when the tour ends. This lets your site record the event or unlock new content.script.js and WordPress can:
fetch('/wp-json/wp/v2/tour-log', {method: 'POST', body: JSON.stringify({scene: 'Lobby'})}).
WordPress stores each hit and builds a “Most-Viewed Rooms” widget.window.dispatchEvent(new CustomEvent('tourComplete')).
An Elementor “Popup on Custom Event” listens for tourComplete and shows a signup form.quizFinished, fire an AJAX request that runs
update_user_meta( $user_id, 'last_quiz', $score ).
Teachers see progress inside the WordPress dashboard.do_action( 'tour_scene_viewed', $scene ).
Developers can attach any WordPress hook—send an email, tag a
CRM
(software that stores and tracks customer details), or add points in a
gamification plugin.
Benefit: These small API calls let the tour and WordPress share data in real time—turning a standalone 360° view into a fully connected part of your website’s content, marketing, and user-tracking systems.
POST
from your tour to a Zapier Webhook URL can set off a whole chain of tasks.
{scene:"Lobby",time:"14:02"}. Zapier adds a new
row—no spreadsheets to manage by hand.Why it beats the default: 3DVista alone saves results only inside the tour or a SCORM file. With one simple webhook you can:
Setup is fast: copy the Zapier webhook URL, paste it
into script.js like so:
// in script.js
player.bind('tourFinished', () => {
  fetch('https://hooks.zapier.com/hooks/catch/123456/abcde/', {
    method: 'POST',
    headers: {'Content-Type':'application/json'},
    body: JSON.stringify({event:'completed',tour:'Space Tour'})
  });
});
No servers to run, no plugins to install—just hook, post, and let Zapier do the heavy lifting.
score = 85 or status = completed.
completed.imsmanifest.xml to change the
passing score or add more data fields. No need to rebuild the
tour in 3DVista.Imagine a museum uses a 3DVista tour as a “virtual field trip.” Students explore at their own pace and answer five quiz questions at the end. The tour—wrapped as SCORM—sends each student’s score to the school’s LMS. The LMS acts like the teacher: it marks “pass” if the score is 4 / 5 or higher, logs the date, and awards a digital badge.
.zip to your LMS.imsmanifest.xml, and tweak
settings such as masteryscore (the passing grade) or
identifier (course code).Everyday examples:
Tip: If you are unsure which format your LMS supports, start with SCORM 1.2 for maximum compatibility. If your LMS manual lists SCORM 2004, use that instead to unlock detailed tracking features.
Bottom line: Packaging your tour as SCORM turns a fun 360° experience into a graded, trackable lesson that plugs straight into any learning platform.
With just a few edits in script.js or your custom CSS, you can:
script.jsBelow are the five code blocks mentioned above. Copy the ones you like, paste them near the bottom of script.js, save, refresh, and watch the tour gain a new trick.
/* ------------- Time-based start scene ------------- */
(function () {
  var h = new Date().getHours();
  var scene = (h < 11) ? "Garden" : (h < 17) ? "Lobby" : "Rooftop";
  player.once('tourReady', function () { player.loadScene(scene); });
})();
/* ------------- Auto-VR on rotation ------------- */
(function () {
window.addEventListener('deviceorientation', function (e) {
if (!player) return;
var autoVr = Math.abs(e.gamma) > 70 && Math.abs(e.beta) < 30;
if (autoVr && !player.isVR()) player.enterVR();
if (!autoVr && player.isVR()) player.exitVR();
}, true);
})();/* -------- Send “tour finished” to Zapier -------- */
(function () {
var done = false;
player.on('sceneEnded', function () {
if (done) return; done = true;
fetch('https://hooks.zapier.com/hooks/catch/XXXXXX/YOUR_WEBHOOK_URL',{
method:'POST',
body:JSON.stringify({event:'tour_end',time:Date.now()})
});
});
})();/* -------------- Live weather overlay -------------- */
(function refreshWeather(){
var lat=28.6084,lon=-80.6040;
fetch('https://api.open-meteo.com/v1/forecast?latitude='+lat+
'&longitude='+lon+'¤t_weather=true')
.then(r=>r.json())
.then(j=>{
var w=j.current_weather;
document.getElementById('weatherBox').textContent=
w.temperature+' °C · code '+w.weathercode;
})
.catch(console.error)
.finally(()=>setTimeout(refreshWeather,900000));
})();/* ------------- Firebase live leaderboard ------------- */
(function () {
var cfg={apiKey:"YOUR_KEY",authDomain:"your-app.firebaseapp.com",
projectId:"your-app",databaseURL:"https://your-app.firebaseio.com"};
firebase.initializeApp(cfg);
var db=firebase.database().ref('scores');
player.on('quizFinished',function(d){
if(d.scorePercent>=80){
var n=prompt('Great score! Name for the board:','');
db.push({name:n||'Anon',score:d.scorePercent,time:Date.now()});
}
});
})();3DVista already lets you swap hot-spot icons, choose skins, and replace its splash-screen logo from inside the editor (see built-in “Skin” & “Hotspot” tools). Everything else below is done after you press “Export”. You simply open the exported files (HTML, JSON, images) in a free text or image editor. Nothing here requires re-compiling the tour or advanced coding.
manifest.json. The file already lists icons, colors, and "display": "standalone", so the tour can install like an app and hide the browser’s bars.manifest.json to set your own "name", "short_name", "theme_color", and "background_color". Repeat after each export.sw.js and register it from the tour’s HTML. Cache panoramas, scripts, and JSON so the tour runs fully offline after one visit.The table below lists every file you can “paint” with your brand, why it matters, and exactly how to do it using free tools such as Notepad, Squoosh.app, ImageMagick or a simple browser console.
| # | File / Folder | Branding Trick | Why it's Good | How (step by step) |
|---|---|---|---|---|
| 1 | index.html <head> | Add custom <meta>, Open Graph & Twitter tags |
Google snippets and social shares show your own title, description and preview image instead of the generic ones |
Open index.html in Notepad → paste<meta name="description" content="Your tour in one line">Add your OG image: <meta property="og:image" content="https://…/hero.jpg">
|
| 2 | manifest.json | Change name, theme-colour, icons | When users “Add to Home Screen”, the shortcut carries your logo and opens with your colour palette |
Replace PNG icons in /misc/ with your own Edit "name": "My Brand Tour"Set "theme_color": "#FF6600"
|
| 3 | favicon.ico / favicon.png | Custom browser-tab icon | Your badge appears in bookmarks and tabs |
Convert logo to 32 × 32 PNG (IcoConverter) Save over favicon.png Update <link rel="icon"> in index.html
|
| 4 | skin.css (or your vista-modifications.css) | Brand colours & Google Fonts | Panels, pop-ups, buttons instantly match your site style |
Paste @import url(…Barlow.css) at top of CSSReplace all colour codes (#5A0000 → #FF6600) |
| 5 | #preloadContainer in CSS | Swap spinner & fade colour | The loading moment carries your animation and hue |
Drop new GIF in /media/ Change background: in CSS to your brand gradient
|
| 6 | /hotspots/*.png | Bespoke hotspot icons | Users click your mascot or logo instead of stock arrows | Create 64 px transparent PNGs → overwrite originals |
| 7 | /panos/thumbs_*.jpg | Retouch or frame thumbnails | Thumbnail bar echoes your brand colours | Batch process in Photoshop (Stroke 3 px, colour #FF6600) → save |
| 8 | script.js | Time-based first scene | Morning visitors start with sunrise, night owls see a night view | Paste the “Time-based start scene” snippet (see list #1) |
| 9 | script.js | Zapier webhooks | Instant emails, Slack alerts, CRM entries without coding a backend | Paste “tour finished” snippet, replace URL with your Zapier hook |
| 10 | Skin → Variables (XML) | Rename interface text | “Points” becomes “Gold Stars”, “Score” becomes “XP” |
Open skin.xml → search <text id="score"> →
change inner text
|
| 11 | /audio/*.mp3 | Voice-over greetings per scene | The tour literally speaks in your brand voice |
Record MP3 → save as scene name (e.g. Lobby.mp3) →
update <audio> path in tour.xml
|
| 12 | /panos/*_tile.webp | Watermark hi-res tiles only | Screenshot pirates still see your mark; small previews stay clean |
ImageMagick: magick composite logo.png tile.webp tile.webp
(batch loop)
|
| 13 | service-worker.js (add) | Pre-cache first scene + logo | Tour opens offline at trade shows | Workbox CLI → choose “cache images in /panos” → copy generated file next to index.html |
| 14 | script.js | Google Tag Manager events | Measure which scenes wow people most |
Paste dataLayer.push({event:'scene',name:s.name}) inside a sceneChanged listener
|
| 15 | index.html overlay | Fixed promo banner or live-chat button | Drive sales or support without leaving the tour |
Add<div id="promo">10 % Off — Use code TOUR10</div>CSS: #promo{position:fixed;bottom:1rem;right:1rem;}
|
3DVista tours do not provide detailed user tracking by default. However, you can add custom tracking code to the tour’s exported files. This lets you see what viewers do in the virtual tour. For example, you can insert a Google Analytics script. With a bit of code, you can hook into tour events. For instance, you can detect when a scene changes or when someone clicks a hotspot. That way, you can log which scenes people view the most. You can also see which info spots they click. User analytics isn’t built in. But these tweaks let you collect useful data about your tour’s viewers.
By default, a 3DVista tour cannot send data to other platforms or receive data from them. You can change that by editing the tour’s code. The tour can make web requests to talk to other services. In practice, the tour can trigger actions outside itself. For example, it could send an email when a viewer clicks a “Contact Us” hotspot. It could also add a new entry to a database for that event. All it takes is a few lines of JavaScript. With that in place, the tour can talk to outside services. This allows integrations that aren’t possible natively.
The standard 3DVista interface has a fixed layout and style. If you want a custom look and feel, you can tweak the exported HTML and CSS. This lets you change the style of interface elements. You can even add new ones to match your brand. For example, you might insert your own logo or watermark into the tour viewer. You could also change the colors and sizes of buttons. The skin editor does not normally allow these changes. Some creators add a custom loading screen with special branding. These changes go beyond the software’s built-in settings. By editing the files directly, you get a more flexible interface. This gives you a fully branded experience.
By default, every viewer sees the same content in a 3DVista tour. There is no personalization in the standard setup. You can change this by adding scripts. These scripts can adjust the content based on who is viewing. The tour can adapt to different users or situations. For example, the tour might greet a signed-in user by name. It can display the name in a welcome panel. It could also use a link parameter (like language or user type) to decide which scene to show. For instance, a special URL could make the tour open in a specific language or mode. In this way, each viewer can get a different experience. Personalization is not built in. But you can still give each viewer a tailored tour. A small custom script can get user data. It then adjusts what the tour displays on the fly.
3DVista’s built-in features like hotspots and quizzes cover common needs. But some ideas need extra code. You can add new functions by modifying the tour’s files. This lets you go beyond what 3DVista offers on its own. For instance, you could embed a live chat window in the tour. Visitors would then be able to talk with a guide in real time. You might even include a video call element. This would allow face-to-face help inside the tour. Some creators have also synced tours for multiple users. This setup lets a group explore together at the same time. None of these are supported out of the box. But they become possible with custom enhancements. These upgrades let you push interactivity further than the standard tour allows.
3DVista tours run well by default. Even so, there are ways to make them load faster. You can boost performance by adjusting the exported files. For example, you might host the tour’s images on a network of global servers (called a CDN). That way, they load more quickly for viewers around the world. You can also fine-tune how and when the tour’s assets load. This way, the tour works best for your audience. Some creators compress or resize media files to reduce their size. They may also use lazy loading for secondary scenes. This makes the tour run smoother on phones and tablets. These tweaks aren’t part of the normal publishing process. With a bit of manual work in the tour’s code and files, you can still make it faster and more efficient.
Add the Google Analytics tag to index.html and link it to scene-change events. Now you can track which rooms guests visit and what they tap.
Use the built-in Live-Guided feature plus a tiny Firebase relay so everyone’s view follows the host. Viewers can still unhook and look around on their own.
Drop a short service-worker script into the tour folder. It caches the pages and image tiles so the tour opens even with no internet.
Slip a Three.js shader into script.js. It can tint, blur, or add retro scan lines to the panorama while it runs.
Create a hotspot that links to a USDZ file with <a rel="ar">. On iPhones, the object appears in the real world through the camera.
When you embed the tour in an iframe, use window.postMessage. The parent site can now react to tour events or steer the tour by code.
Load the Web Speech API. Map words like “next room” to tour actions, giving hands-free control and better access.
Add a small fetch() loop in script.js. It grabs JSON (weather, scores, stock prices) and updates hotspot text every few seconds.
When the tour finishes scoring, send a Zapier webhook to Google Sheets. Show the top scores in a pop-up so players compete.
Replace the default skin files with ones from the 3DVista Marketplace or your own CSS. The interface now matches your brand exactly.